Introduction
Maintaining proper battery condition is critical for reliable operation of modern vehicles. The Battery Health Check function on the INNOVA® BA201 Battery Tester Tablet is designed to evaluate the overall condition of a vehicle battery by measuring key electrical and performance parameters. This comprehensive assessment analyzes multiple battery characteristics and generates a detailed report that helps identify battery-related issues and supports accurate service decisions.
The Battery Health Check determines battery condition by examining measured parameters and providing a clear status evaluation. The test results assist in identifying whether the battery is operating normally, requires charging, or should be replaced. This function can be performed with the battery installed in the vehicle (In-Vehicle Test) or with the battery removed from the vehicle (Out-of-Vehicle Test). In both test modes, the system provides detailed diagnostic results to help pinpoint performance concerns and identify the most appropriate corrective actions.
Procedure
NOTE: Inspect the battery terminals for sulfate deposits and other corrosion. Use a brush to thoroughly clean the terminals before connecting the Battery Tester Tablet.
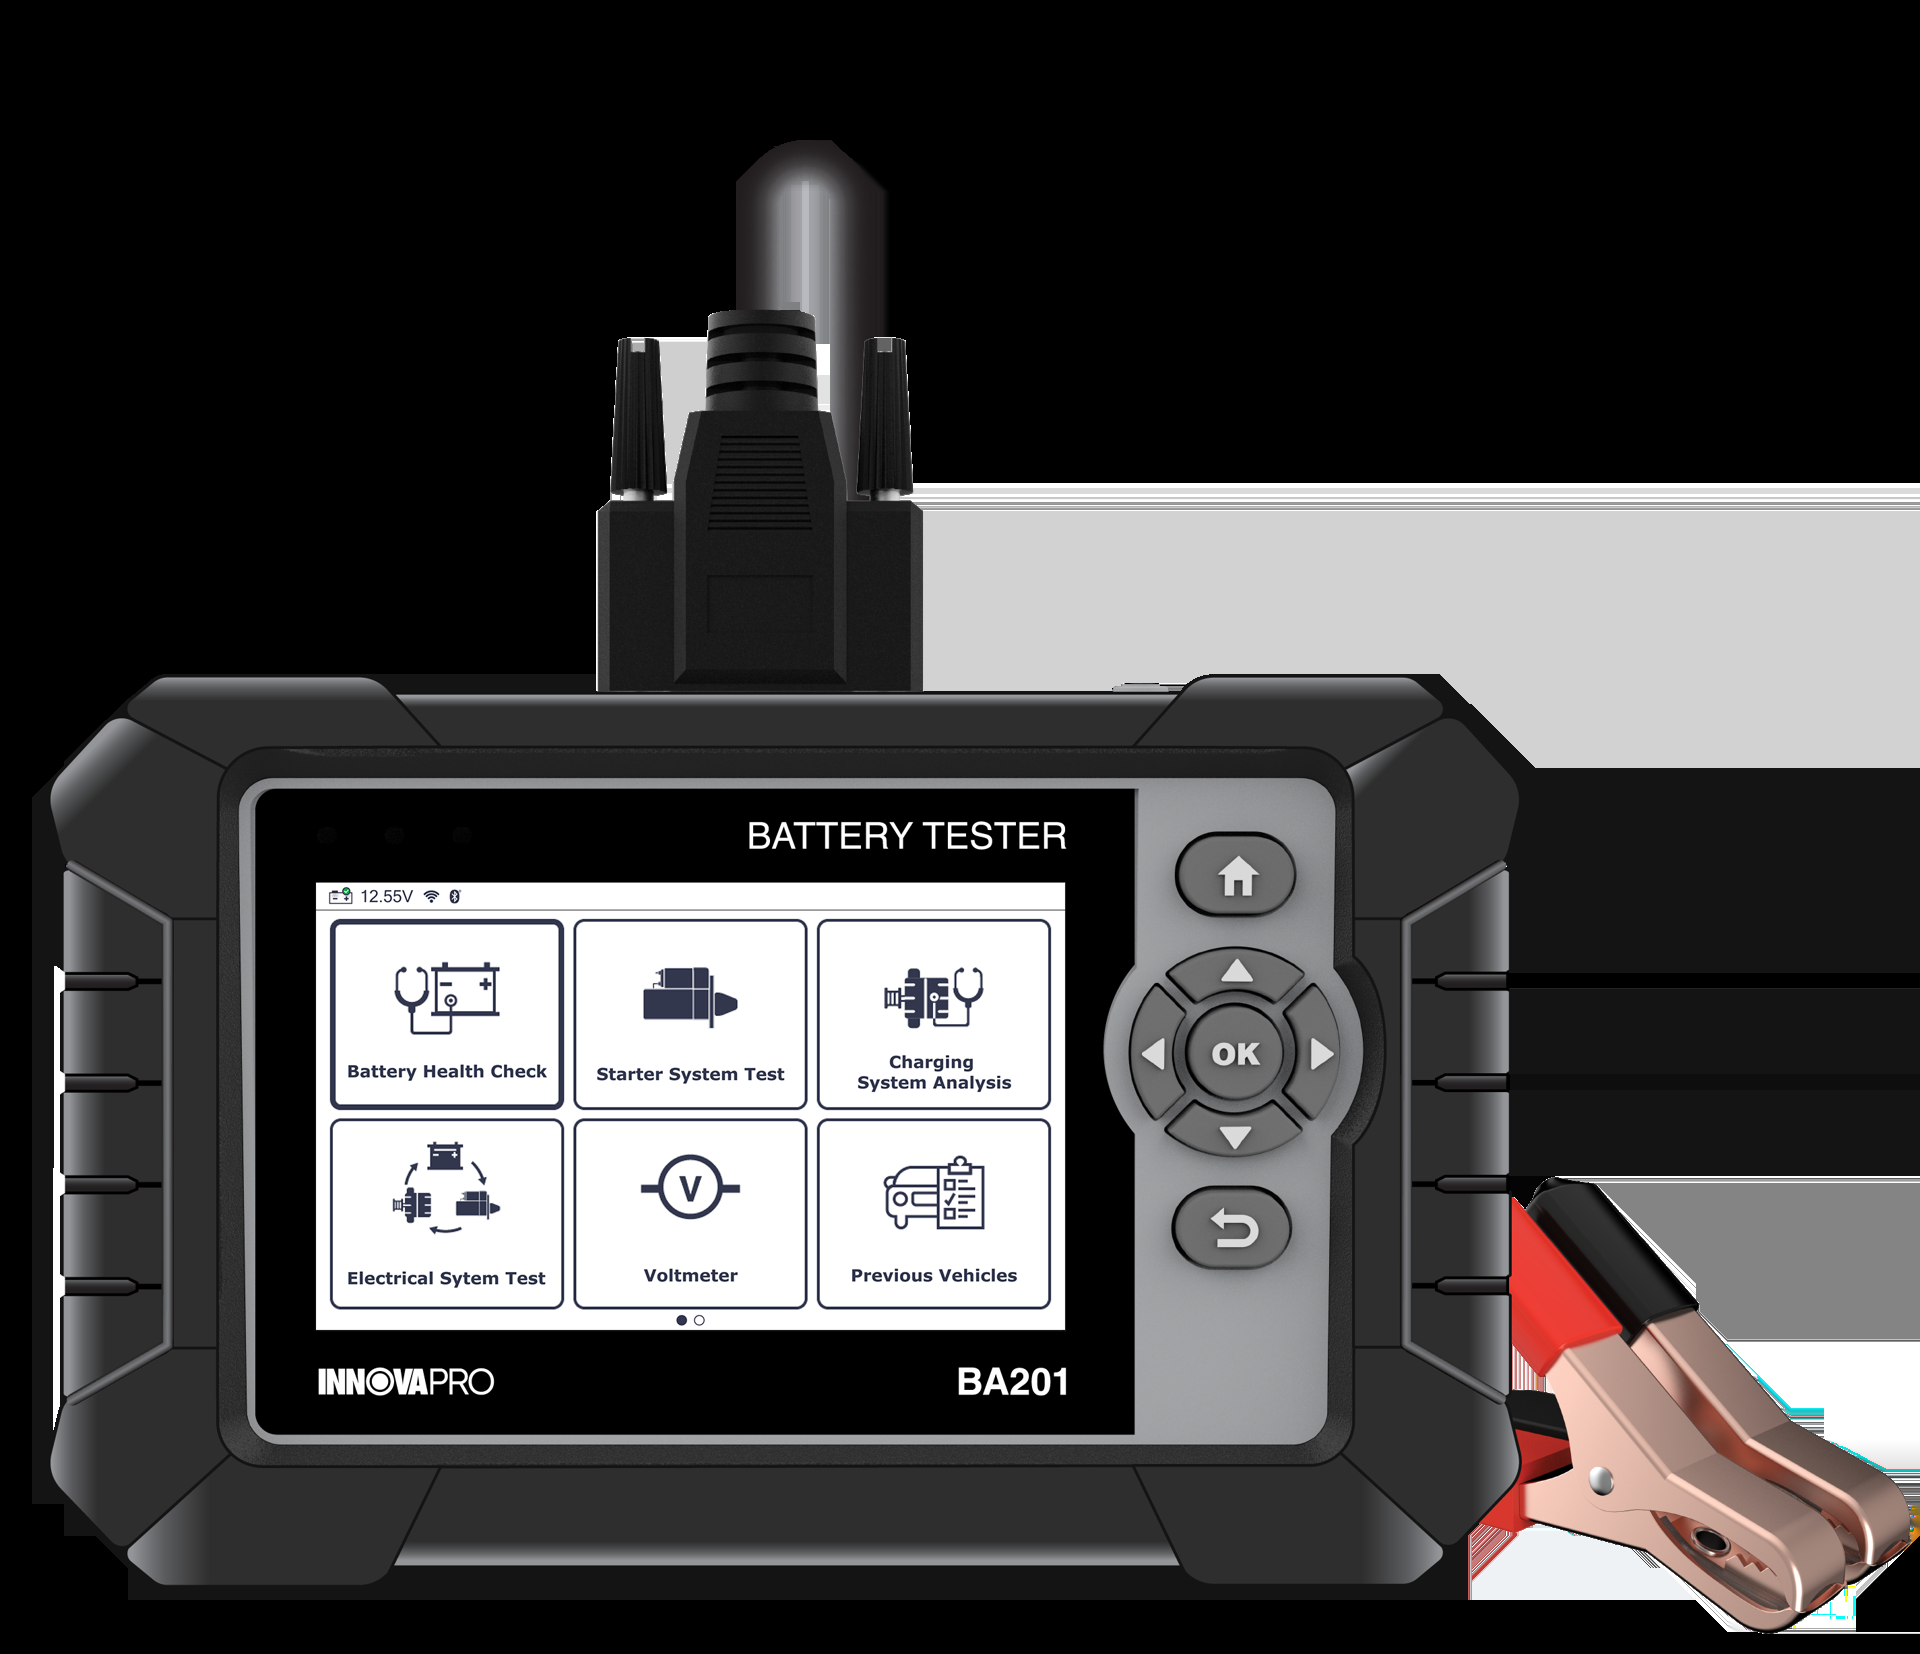
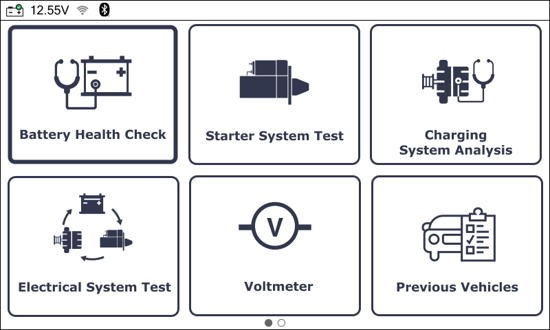
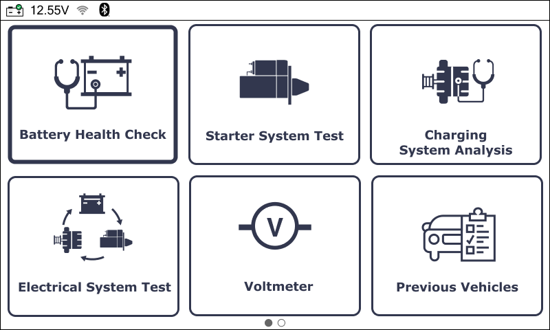
From the Homescreen, select Battery Health Check. The Test Location screen displays. Then, select the desired test as follows.
In Vehicle Test: Perform Battery Health Check with the battery installed in the vehicle. This function performs a deep test of battery health by combining multiple tests for optimal accuracy.
Out of Vehicle Test: Perform Battery Health Check with the battery removed from the vehicle.
NOTE: If battery voltage is less than 11.8V, the message ‘Charge the battery and retest’ displays, indicating that the battery needs to be charged before trying again.
In Vehicle Test
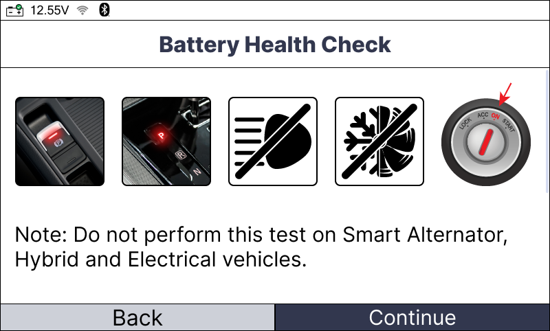
Warning: Do not perform this test on Smart Alternator, Hybrid, or Electric vehicles.
NOTE:
- If the battery is a wet cell (maintenance-type), check the electrolyte level (the level of the mixture inside the battery that transmits electricity between the terminals of the battery). Make sure the electrolyte is at the required level for the battery type to obtain the most accurate test results.
Make sure the connection between the test clamps and the battery terminals are good to ensure test results are correct.
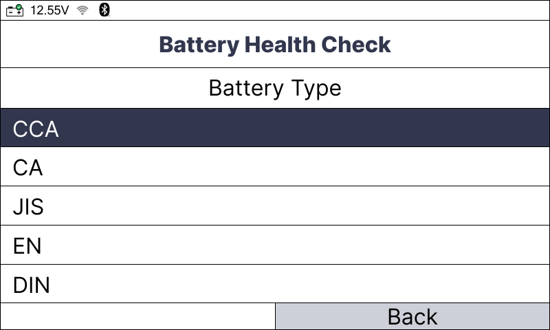
Step 1. After selecting In Vehicle Test, select the Type, Standard, and Rating of the battery.
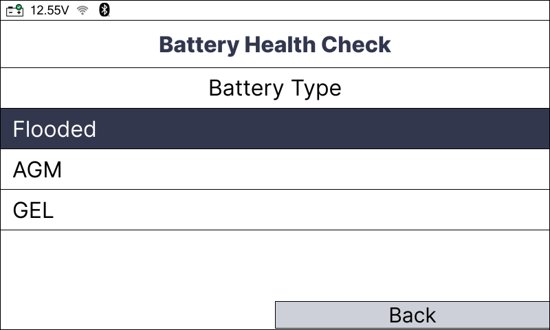
Select the desired Battery Type.
Select the desired Battery Standard.
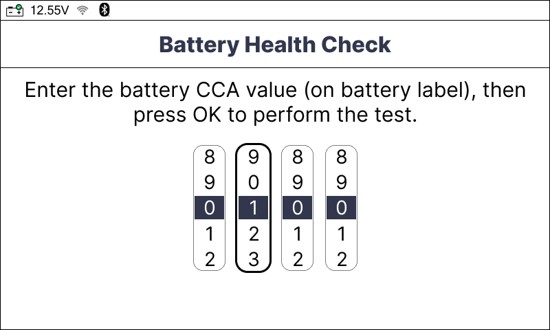
Enter the value for the Battery Standard you previously selected.
Use the Up/ Down buttons to choose the desired value.
Use the Left/ Right buttons to change the next digit.
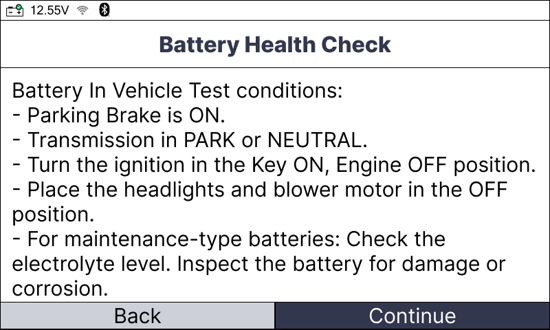
Step 2. The screen displays the test conditions required before starting the test. Confirm that all conditions are met, then select Continue.
Step 3. The battery tester checks for the presence of surface voltage.
If there is no surface voltage, proceed to next step.
If there is surface voltage, an “instructional” screen displays. Follow the instructions to clean surface voltage, then select Continue.
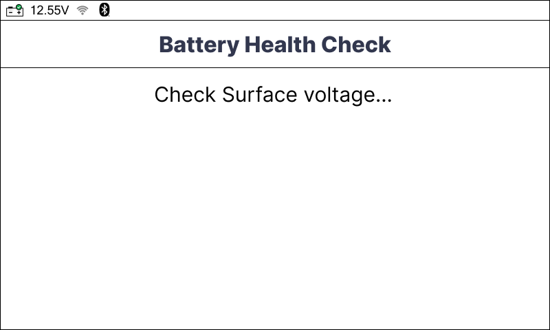
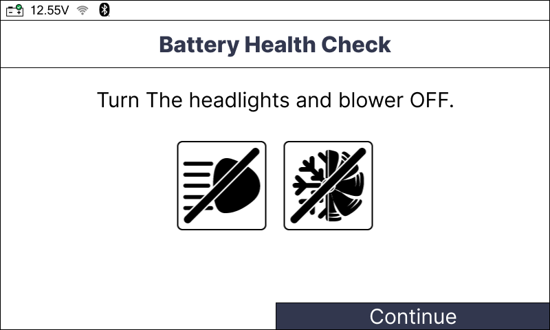
Step 4. The battery tester proceeds to perform the battery health check (In Vehicle Test).
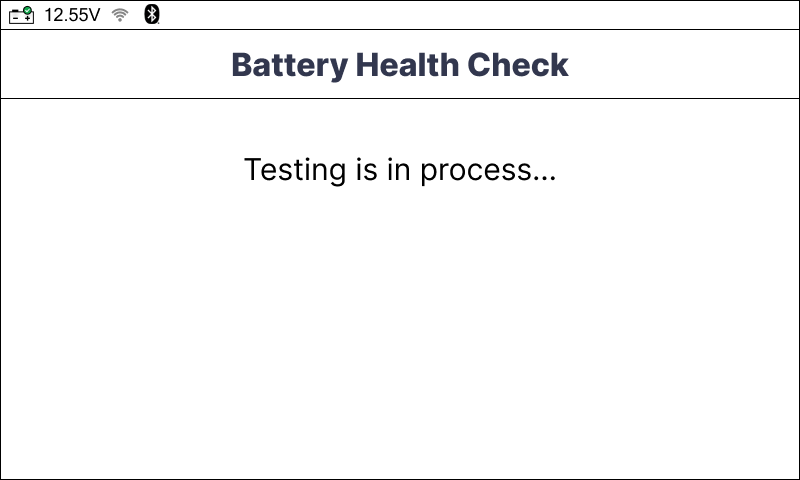
The screen displays the requirement to start the engine within 30 seconds while performing the test.
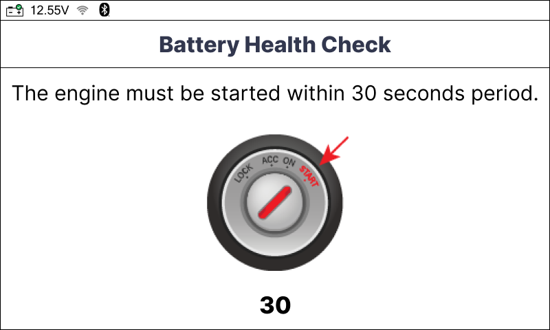
Start the vehicle’s engine when prompted. An “instructional” screen displays requiring you to turn the engine and all vehicle accessories OFF. Select Continue to complete the test.
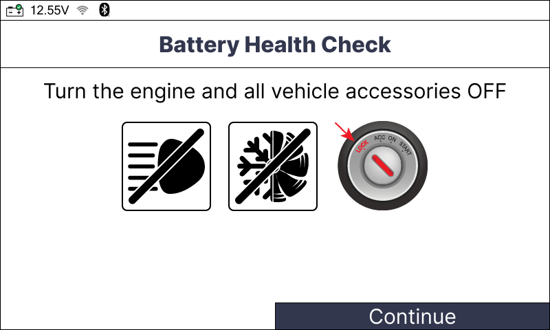
NOTE: If no engine start is detected, the screen displays a notification for the test failure and requests for retesting.
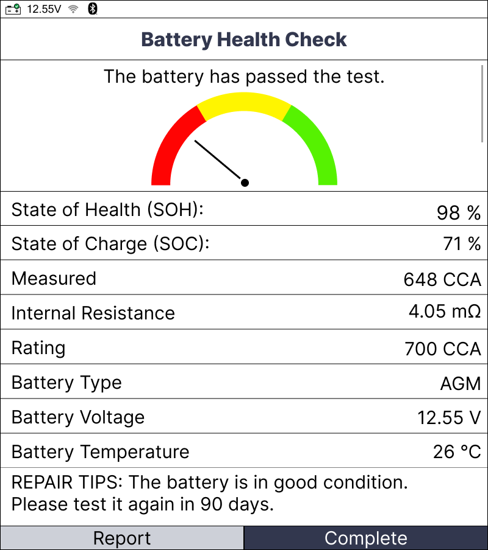
Step 5. The Battery Result screen displays.
Select Report to submit the test report to RSPRO® App via Wi-Fi network.
- Select Complete. The battery tester returns to the Home screen.
Out-of-Vehicle Test
NOTE:
- If the battery is a wet cell (maintenance-type), check the electrolyte level (the level of the mixture inside the battery that transmits electricity between the terminals of the battery). Make sure the electrolyte is at the required level for the battery type to obtain the most accurate test results.
- Make sure the connection between the test clamps and the battery terminals are good to ensure test results are correct.
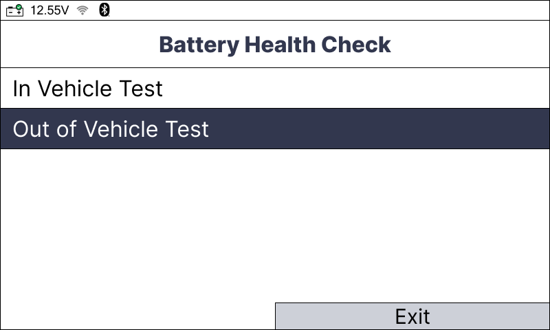
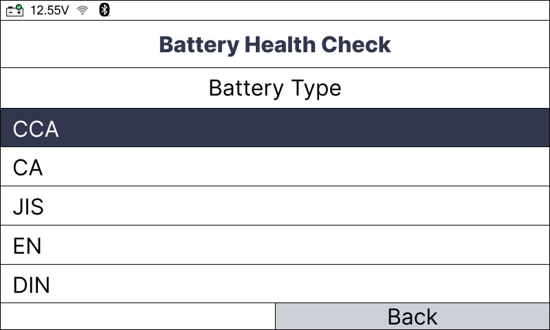
Step 1. After selecting Out of Vehicle Test, select the Type, Standard, and Rating of the battery.
Select the desired Battery Type.
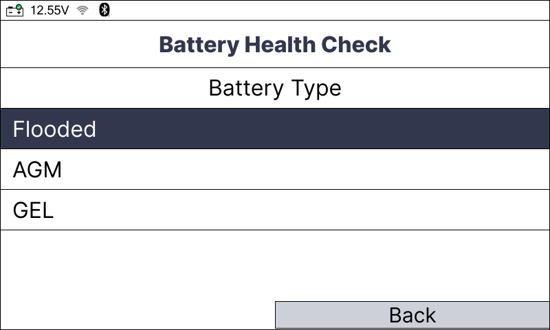
Select the desired Battery Standard.
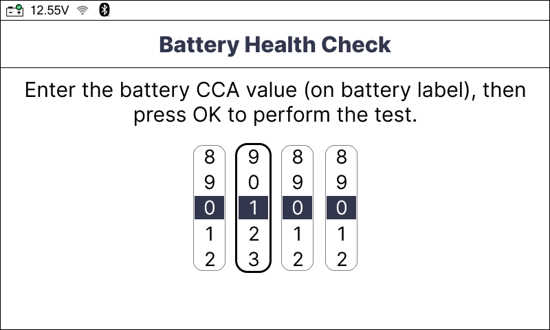
Enter the value for the Battery Standard you previously selected.
Use the Up/ Down buttons to choose the desired value.
Use the Left/ Right buttons to change the next digit.
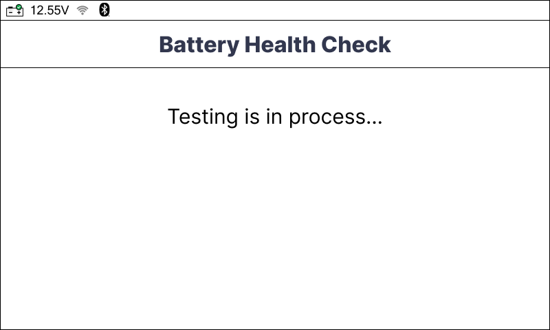
Step 2. The battery tester proceeds to perform the battery health check (Out-of-Vehicle Test).
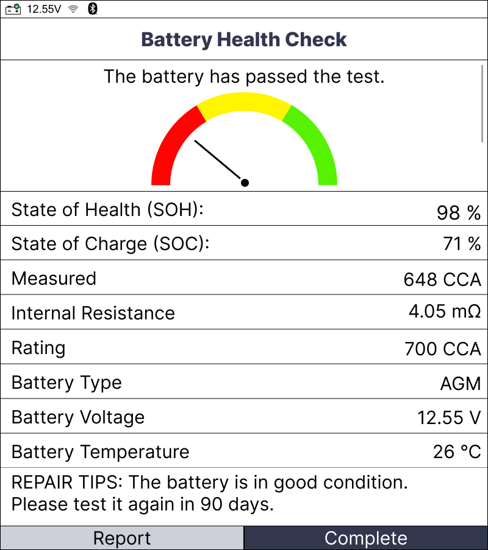
Step 3. The Battery Result screen displays.
Select Report to submit the test report to RSPRO® App via Wi-Fi network.
Select Complete. The battery tester returns to the Home screen.
Test Result Explanation
There are four types of result when you perform Battery Health Check: Good Battery, Good - Recharge, Charge - Retest, Replace Battery. The type of result is shown at the beginning of each report, which also includes relevant parameters to help you further understand the condition of your battery. REPAIR TIPS are provided at the end of the test results to advise what you should do with your battery.
1. Good Battery: This result indicates the battery is in good condition.
Follow the Repair Tip to fix the issues: “The battery is in good condition. Please test it again in 90 days.”
2. Good – Recharge: This result indicates the battery is in good condition but not fully charged.
Follow the Repair Tip to fix the issues: “The battery is in normal condition but isn’t fully charged. Please recharge the battery.”
3. Replace Battery: This result indicates the battery should be replaced.
Follow the Repair Tip to fix the issues:
- In Vehicle Test: “Replace the battery and retest. In some cases, a poor connection between the battery terminal and the tester clamp may affect test results. After disconnecting the battery cables, conduct an out-of-vehicle test before proceeding with the battery replacement.”
Out of Vehicle Test: “Replace the battery and retest. In some cases, a poor connection between the battery terminal and the tester clamp may affect test results.”
4. Charge – Retest: This result indicates the battery should be recharged and retested as the current battery condition may provide inaccurate results. If you still receive this result after the battery has been fully charged, consider replacing it.
Follow the Repair Tip to fix the issues: “To ensure accurate results, fully charge the battery before performing this test. If the "CHARGE - RETEST" status remains after the battery is fully charged, replace the battery as soon as possible.”


