Introduction
Maintaining optimal battery health is essential in modern vehicles. The Battery Health Check function on the Battery Tester Module helps determine the battery's condition by measuring various parameters. This comprehensive assessment provides detailed results that help pinpoint problems and identify the most suitable solutions. This article provides detailed instructions on how to use the Battery Health Check function, highlighting its benefits and functionality within the Battery Tester Module.
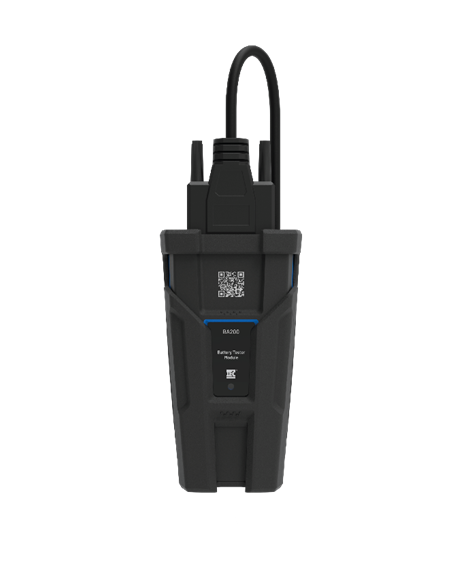
Instructions
NOTE: Inspect the battery terminals for sulfate deposits and other corrosion. Use a brush to thoroughly clean the terminals before connecting the Battery Tester Module.
Step 1: Connect the Battery Tester Module with the RSPRO® App.
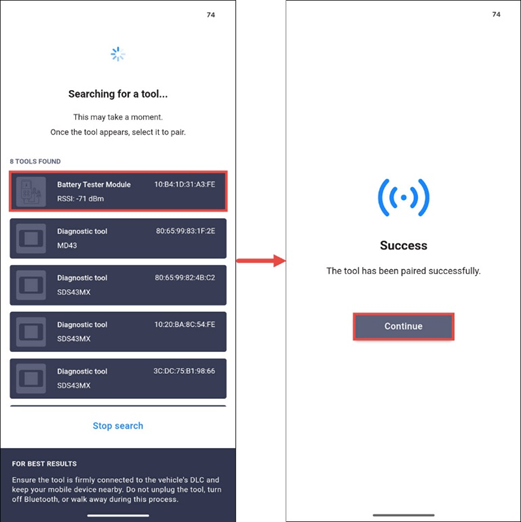
Step 2: Tap Battery Health Check in the Battery Tester Module menu.
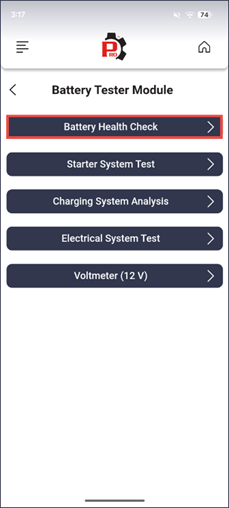
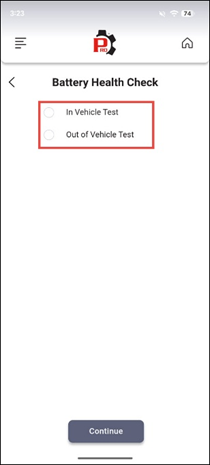
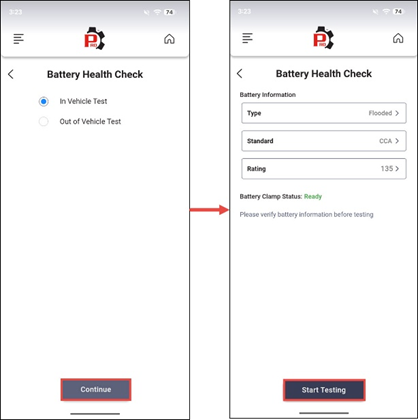
Step 3: Select the desired test as follows, then tap Continue.
In Vehicle Test: Perform Battery Health Check with the battery installed in the vehicle. This function performs a deep test of battery health by combining multiple tests for optimal accuracy.
Out-of-Vehicle Test: Perform Battery Health Check with the battery removed from the vehicle.
NOTE: If battery voltage is less than 11.8V, the message ‘Charge the battery and retest’ displays, indicating that the battery needs to be charged before trying again.
In Vehicle Test
Warning: Do not perform this test on Smart Alternator, Hybrid, or Electric vehicles.
NOTE: If the battery is a wet cell (maintenance-type), check the electrolyte level (the level of the mixture inside the battery that transmits electricity between the terminals of the battery). Make sure the electrolyte is at the required level for the battery type to obtain the most accurate test results.
1. After selecting In Vehicle Test, Select the Type, Standard, and Rating of the battery. Selection of the YMME or VIN of the vehicle is optional. Connect the test clamps to the battery terminals, red clamp to the positive terminal and black clamp to the negative terminal. Ensure that the Battery Clamp Status shown on the screen is Ready, then tap Start Testing.
NOTE:
YMME or VIN can be entered manually or selected from a list of memorized vehicles. The VIN can also be scanned by choosing the Scan VIN Using Camera function.
Make sure the connection between the test clamps and the battery terminals are good to ensure test results are correct.
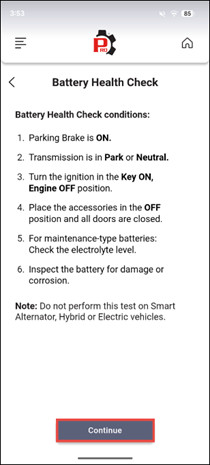
2. After that, follow the list of Battery Health Check conditions shown on the screen to prepare the vehicle for testing, then tap Continue.
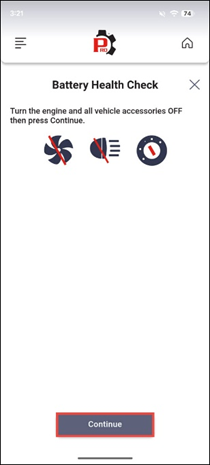
3. When prompted, start the vehicle’s engine within 30 seconds. Follow the instructional screen and turn the engine and all vehicle accessories OFF when prompted, then tap Continue.
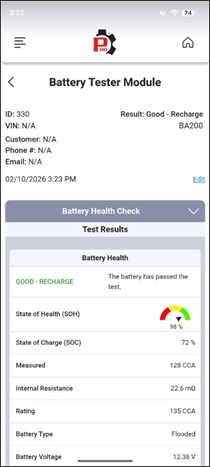
4. After following the prompt, Battery Report screen displays.
Out-Of-Vehicle Test
1. After selecting Out-of-Vehicle Test, Select the Type, Standard, and Rating of the battery. Selection of the YMME or VIN of the vehicle is optional. Connect the test clamps to the battery terminals, red clamp to the positive terminal and black clamp to the negative terminal. Ensure that the Battery Clamp Status shown on the screen is Ready, then tap Start Testing.
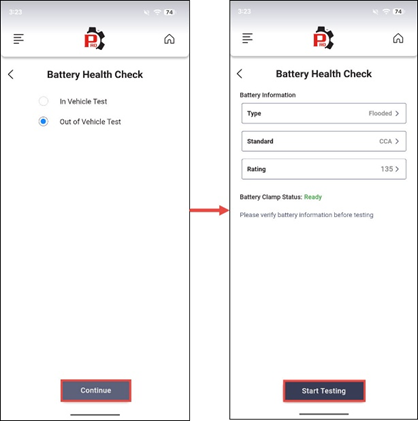
2. After following the prompt, Battery Report screen displays.
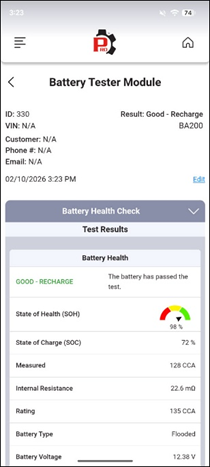
Test Result Explanation
1. Good Battery: This result indicates the battery is in good condition.
Follow the Repair Tip to fix the issues: The battery is normal. Test the battery again in 90 days.
2. Good – Recharge: This result indicates the battery is in good condition but not fully charged.
Follow the Repair Tip to fix the issues: The battery is normal but is not fully charged. Recharge the battery.
3. Replace Battery: This result indicates the battery should be replaced.
Follow the Repair Tip to fix the issues: Replace the battery and retest. In some cases, poor connection between the battery terminal and the battery tester clamp may affect test results. Disconnect the battery cables and perform the out-of-vehicle test before replacing the battery.
4. Charge – Retest: This result indicates the battery should be recharged and retested as the current battery condition may provide inaccurate results. If you still receive this result after the battery has been fully charged, consider replacing it.
Follow the Repair Tip to fix the issues: For accurate results, the battery must be fully charged before performing this test. Replace the battery as soon as possible if the CHARGE-RETEST state persists after the battery has been fully charged.
Video Reference
Copyright 2026 IEC. All rights reserved.


