Hyundai Santa Fe Replace Fuel Tank Cap To Fix DTC P0456
Purpose
This article outlines the procedures to diagnose and confirm Diagnostic Trouble Code (DTC) P0456 on a 2018 Hyundai Santa Fe, and to replace the Fuel Tank Cap to resolve the issue.
Introduction
In cases where the Malfunction Indicator Lamp (MIL) on your vehicle’s dashboard is illuminated and the Engine Control Module (ECM) has stored DTC P0456 (Evaporative Emission System-Leak Detected (Very Small Leak)), it indicates the ECM has detected that the vacuum generated within a monitoring period increases above a defined threshold. A common cause of this DTC is a loose or leaking fuel tank cap.
The fuel tank cap plays a crucial role in maintaining the efficiency, safety, and environmental friendliness of your vehicle by preventing fuel vapor from escaping the fuel tank through the filler neck. Operating your vehicle with a leaking Evaporative System will result in increased emissions.
To correct this DTC, inspect the vehicle’s fuel system, Canister Close Valve (CCV), Evaporative Emissions (EVAP) Purge Control Valve (PCSV) and replace the fuel tank cap as needed to correct this problem.
Symptoms of DTC P0456 include:
- Malfunction Indicator Lamp (MIL) ON or flashing
- Fuel odor in the vehicle
- Poor fuel economy
Possible causes of this fault include:
- Faulty fuel tank cap
- Faulty Vapor Canister Purge Control Valve
- Faulty Vapor Canister Close Valve
 |
|
| Step Time required (hour) Sections Cautions |
2 1.0 5 0 |
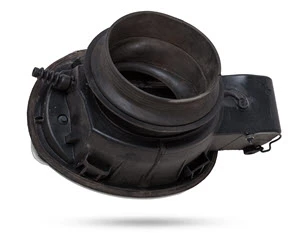
| Model | Part number | Part name |
|---|---|---|
|
Hyundai Santa Fe |
31010-3L600 |
Fuel Tank Cap |
(This image is for illustrative purposes only and may not match the actual part number)
Inspection and Diagnosis
Initial Inspection
During your initial inspection, check for obvious mechanical signs such as torn inlet boots, missing or broken vacuum tees, and/or cracked, broken, or disconnected wire harnesses. Make sure all harness connectors are properly placed in the connectors and holders. This will prevent potential open or short-circuit issues. Also, check the connector for corrosion, frayed wiring, and damaged terminals.
Always check for cracked or broken fuel hoses, vacuum lines and pipes and fuel cap before attempting to diagnose EVAP leaks. This fault may be caused by water entering the canister close valve causing damage to the filter, valve, and charcoal canister; in addition, open circuit faults may also be caused by disconnected components. Refer to the Vehicle Emission Warranty Manual for time and mileage coverage for the emission-related fault(s). For additional information, refer to the Service Manual or applicable Technical Service Bulletin (TSBs).
Diagnostic Procedures
Inspect Fuel Tank Cap
1. Inspect the fuel cap for obvious signs of leakage and cracked O-ring.
- If the O-ring is cracked, replace, and perform Repair Validation.
- If the O-ring inspection appears to be good, go to Step 2.
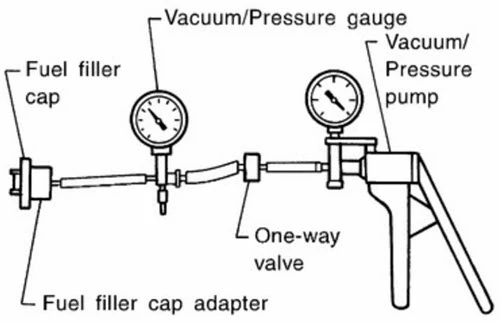
2. Use the fuel cap pressure test tool kit to apply pressure (approximately 2 PSI) and wait 10 seconds.
- If the pressure is held, the Fuel Tank Cap is good. Inspect the other components: Purge Control Valve, Canister Close Valve.
- If the pressure cannot be held, replace the Fuel Tank Cap, and perform Repair Validation.
Repair Validation:
1. Clear DTC(s) and Freeze Frame (FF) data.
2. Perform the drive cycle requirements for the fault area.
3. Check for pending or stored DTCs. If none are found, the repair is complete.